Booking your first glamping trip usually comes with one nagging question: will I actually be able to charge my phone, see after dark and cook a decent meal, or am I signing up for candles and cold beans? It’s a fair worry. Glamping site power and lighting vary enormously from one site to the next, and the photos on a listing rarely tell the whole story.
This guide walks you through exactly what to expect. We’ll cover the three most common power setups, which devices are safe to plug in and which will trip the breaker, how to manage a solar-powered stay, and what cooking looks like both with and without electricity. You’ll also get a simple pre-booking checklist so you can confirm the details with your host before you pay, rather than discovering them in the dark.
What Glamping Site Power and Lighting Actually Looks Like
Glamping site power and lighting generally fall into one of three setups, and knowing which one you’ve booked changes how you pack. The first is full mains power, where the unit is wired like a small cabin, with proper sockets and electric lighting throughout. The second is partial power: you get lighting plus a single socket, or sockets rated only for low-watt devices. The third is fully off-grid, running on solar panels and a battery bank, which usually means no guest sockets at all.
How many sockets can you expect?
Powered units typically offer between two and four sockets, and these are rated for low-watt devices like phone chargers and laptops rather than anything with a heating element. In the UK and Europe that usually means 240V mains, while US sites typically run 110–120V. Treat the socket count as a guide rather than a guarantee, and confirm the details with the host if it matters to your stay.
What the lighting is like
Lighting is almost always warm LED, which suits the cozy atmosphere sites aim for. Depending on the unit, you might find ceiling lights, bedside lamps or string lights draped along the frame of the tent or dome. Some units include a dimmer, which is genuinely useful when one person wants to read and the other wants to sleep. Off-grid units rely on the same LED fittings, just powered by battery, so the light quality is similar even where the sockets are absent.
Charging Devices: What Works and What Trips the Circuit
The good news is that the devices most of us travel with are exactly the ones glamping power supplies handle well. Phone chargers, cameras, e-readers and laptops draw very little power, so they’re safe on almost any glamping setup, from full mains to a modest battery bank. If your plan is to charge a phone and maybe edit photos on a laptop, you’re unlikely to run into trouble.
Problems start with high-draw items. Hair dryers, kettles and electric heaters commonly pull between 1,000 and 2,000 watts, which is far more than most site circuits are designed for. Plugging one in frequently trips the breaker, and many hosts ban these items outright in their house rules. If you need a hair dryer, check the listing before assuming there’s one provided or that your own will work.
One of the smartest things you can bring is backup power. A portable power bank in the 10,000 to 20,000mAh range typically recharges a smartphone two to four times, which covers a long weekend even if the sockets are temperamental. If you’re unsure what else belongs in your bag, this complete glamping packing checklist covers the essentials.
Finally, ask the host before booking whether the sockets are for lighting only or full device use. Some listings advertise “electricity” when it really means an LED strip and nothing more.
- Charge overnight, not all at once: on sites with limited battery stores, hosts sometimes ask guests to avoid charging multiple devices simultaneously, since several laptops charging together can strain the system the same way a kettle would.
- Bring the right plug adapter: some sites mix UK-style three-pin sockets with European two-pin outlets, especially in converted barns or imported safari tents, so a small universal adapter saves frustration.
- Check for USB ports: newer units often include built-in USB sockets beside the bed, which means you can skip the plug entirely for phones and e-readers.
- Ask about spare fuses or a reset switch: if you do trip a breaker, knowing whether you can reset it yourself or need to find the host at midnight makes a real difference.
Off-Grid and Solar-Powered Sites: Managing Limited Electricity
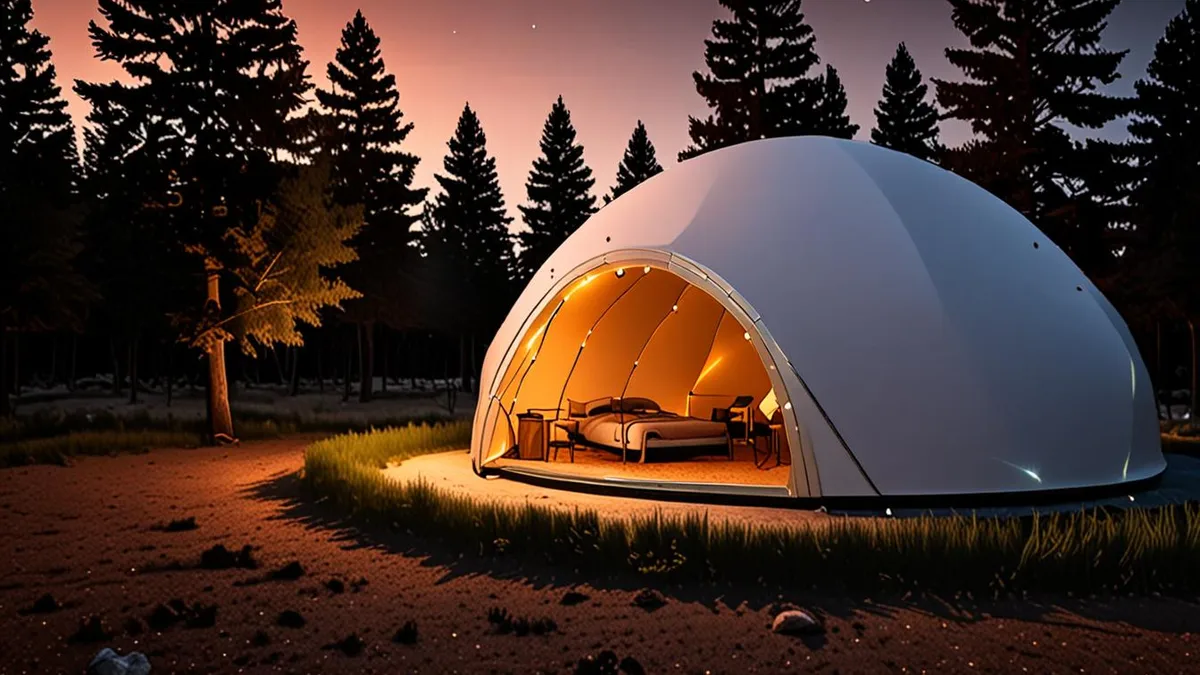
Off-grid glamping sites run on solar panels charging a battery bank, and these setups are usually designed to support just two things: LED lighting and phone charging. There’s typically no socket access for guests at all, so leave the laptop, travel kettle and hair straightener at home. If a listing mentions “solar power” or “off-grid,” assume your devices stay in your bag except for the essentials.
Timing your charging
Battery capacity drops noticeably on overcast days and during short winter days, when the panels simply can’t replenish what the lights consumed overnight. The practical habit is to charge your devices during daylight hours, when the system has surplus power, rather than plugging in after dark when the battery is already working to run the lights. If you’re considering a cold-season trip, our guide to glamping in winter and how cold-weather stays work explains how heating and power change when temperatures drop.
Communal charging points
Many off-grid sites solve the socket problem with a communal charging point in the main lodge, reception building or a shared barn. Guests can plug in phones, cameras and power banks there during the day, which works well if you carry a power bank to top up and bring it back to your unit. Ask the host where this point is located and whether it’s accessible around the clock, since some lodges close in the evening. A 10,000 to 20,000mAh power bank is especially valuable here: one full charge at the lodge can keep your phone alive for two to four recharges back at your tent.
Cooking With Electricity: Kettles, Hobs and Shared Kitchens
Electric cooking at glamping sites varies enormously depending on what you book. Premium units — think safari tents, lodges and cabins at the higher end of the market — often include a small induction hob, a microwave and sometimes a mini fridge inside the unit. Budget tents and pods, by contrast, frequently have no electric cooking equipment at all, even when the unit has power for lights and charging.
The good news is that many sites solve this with a shared kitchen or campers’ kitchen building. These usually have full-size appliances you can use, such as a proper oven, a larger hob, a toaster and a communal fridge. It’s worth checking how far that building is from your unit, because a five-minute walk with a pan of pasta water is very different from a stroll across a field in the rain.
Fridges deserve special attention. If your unit doesn’t include one, most sites expect you to bring your own cool box or rent one on site. If you’re comparing options, remember that units with full mains power and built-in appliances typically cost more — you can see how stay type affects pricing in this breakdown of glamping costs by accommodation type.
- Induction hobs in premium units usually mean you’ll need compatible pans — some hosts provide them, but flat-bottomed, induction-ready cookware isn’t a given, so ask.
- Shared kitchen etiquette often includes cleaning up after yourself and storing food in labeled containers, so bring a marker or labels if you’re staying several nights.
- Cool box ice melts faster than you’d expect in summer, so check whether the site shop or a nearby store sells ice blocks for refreshing your box daily.
- Mini fridges are small — often bar-fridge size — so plan your food shopping in smaller, more frequent trips rather than one big shop.
Cooking Without Power: Gas Rings, Fire Pits and BBQs
At off-grid glamping sites, cooking almost always comes down to two things: a two-ring gas stove and a fire pit grill. This combination is the standard setup at most sites without mains power, and it works surprisingly well once you get the hang of it. The gas rings handle morning coffee and quick meals, while the fire pit takes care of anything that benefits from real flame — grilling meat, toasting marshmallows or heating a cast-iron pan.
Before you pack, confirm exactly what’s provided. Some sites supply everything: cookware, utensils, plates and even the gas canisters or firewood. Others expect you to bring your own, and arriving without a single pan is a mistake first-timers make more often than you’d think. A quick message to the host saves you a frustrating first evening.
Fire pits and the seasons
Fire pits are often seasonal. Many sites ban open flames during dry summer months or in high-wind conditions, which can be a disappointment if you’d planned your whole trip around campfire cooking. Check the site’s fire policy for your travel dates, and have a backup plan such as the gas stove. It’s also worth asking whether firewood is sold on site or whether you need to bring your own, since collecting wood from the surrounding area is usually not allowed.
How to Check Power and Cooking Setup Before You Book
Most surprises about glamping power and cooking are avoidable with ten minutes of research before you book. Listings vary wildly in how much detail they give, so a combination of reading the description carefully, messaging the host and checking reviews will tell you almost everything you need to know. The key is knowing what to look for, because a listing can look inviting in photos while leaving out the one detail that shapes your whole stay, like whether the sockets actually power anything beyond a bedside lamp.
Timing matters too. Do this check before you pay the deposit, not the night before you pack. If a host is slow to reply or vague about the basics, treat that as useful information in itself and keep looking. It also helps to save the host’s answers, since a written confirmation of what’s included gives you something to refer back to if anything doesn’t match on arrival.
- Read the listing for power keywords. Look for phrases like ‘mains power’, ‘solar’, ‘off-grid’ or ‘no electricity’. These tell you immediately whether you’ll have usable sockets, lighting-only power or neither — and they matter far more than photos, which rarely show the practical details.
- Message the host with three direct questions. Ask how many sockets are available for guest use (as opposed to lighting only), what cooking facilities exist in or near the unit, and what the lighting is like after dark. Hosts who answer clearly and specifically are usually a good sign for the whole stay.
- Scan recent reviews for red flags. Search for mentions of dark units, dead batteries or missing cookware. A single older complaint may be a one-off, but several recent reviews mentioning the same issue usually reflect reality.
- Compare prices with power in mind. Expect to pay roughly 10–30% more for units with full mains power compared with off-grid options. If two otherwise similar units differ in price, the power setup is often the reason.
Doing this check takes minutes, and it’s the difference between booking a unit that matches your expectations and discovering on arrival that your hair dryer is useless and dinner means cooking over a fire in the dark. Nearly all power and cooking disappointments come down to skipped research rather than genuinely bad sites. Ten focused minutes before booking is all it takes to avoid almost every one of them.
The Bottom Line on Power, Light and Cooking
Glamping power varies far more than most first-timers expect: some units have full mains sockets and an induction hob, while others offer nothing beyond solar-powered LED lighting and phone charging. Cooking setups split the same way, from electric appliances and shared kitchens to two-ring gas stoves and fire pits. So no, you won’t be stuck with candles and cold food, as long as you know what your site actually provides.
The good news is that a short pre-booking check removes nearly all surprises. Look for keywords like “mains power” or “off-grid” in the listing, message the host about sockets, cooking gear and lighting, and scan recent reviews for mentions of dark units or dead batteries. Ten minutes of checking covers phones, lights and dinner. If this guide helped you plan your first trip, leave a comment or share it with a fellow traveler.