Booking a glamping trip should feel exciting, but many travelers share the same worry: will I arrive to a freezing, powerless tent in the middle of nowhere? The question of glamping tents electricity and heating comes up constantly, and for good reason. Amenities vary enormously between a luxury safari tent with wall sockets and a simple bell tent lit by a single solar lamp.
This guide walks you through what to realistically expect, from the short answer on power and warmth to how heating actually works in cold-season stays. We’ll break down amenities by tent type, explain your options when there’s no mains power, and show you exactly how to confirm the details with a host before you pay. You’ll also find practical packing and budgeting tips, plus a clear bottom line so you can book with confidence instead of crossing your fingers.
Do Glamping Tents Have Electricity and Heating? The Short Answer
The short answer is that it depends on the tent and the site, but most mid-range and premium glamping accommodations do include mains electricity and some form of heating. A safari tent at an established resort will typically have wall sockets, lighting and an electric radiator or wood burner, while a basic canvas bell tent on a small farm site might offer nothing more than a solar-powered lantern and a shared fire pit.
Heating itself comes in several forms. In yurts and glamping domes, you’ll most often find a wood stove as the heat source. In safari tents connected to the grid, electric radiators or panel heaters are common, sometimes paired with a wood burner for atmosphere.
Why you should never assume
Availability depends on three things: the type of tent, the infrastructure of the site and the season you’re visiting. A site that offers heated tents in winter may close its basic units entirely, and some hosts switch heating on only for cold-season bookings. The safest approach is simple: always check the listing’s amenity section before you book, and if anything is unclear, message the host directly. A two-minute question can save you a very cold night.
Power and Heating by Tent Type
Not all glamping tents are built the same, and the gap between tent types is where most booking surprises happen. Understanding what each style typically offers makes it much easier to match your expectations to your budget. If you’re weighing several options, it helps to see how glamping domes, safari tents and yurts differ before you commit.
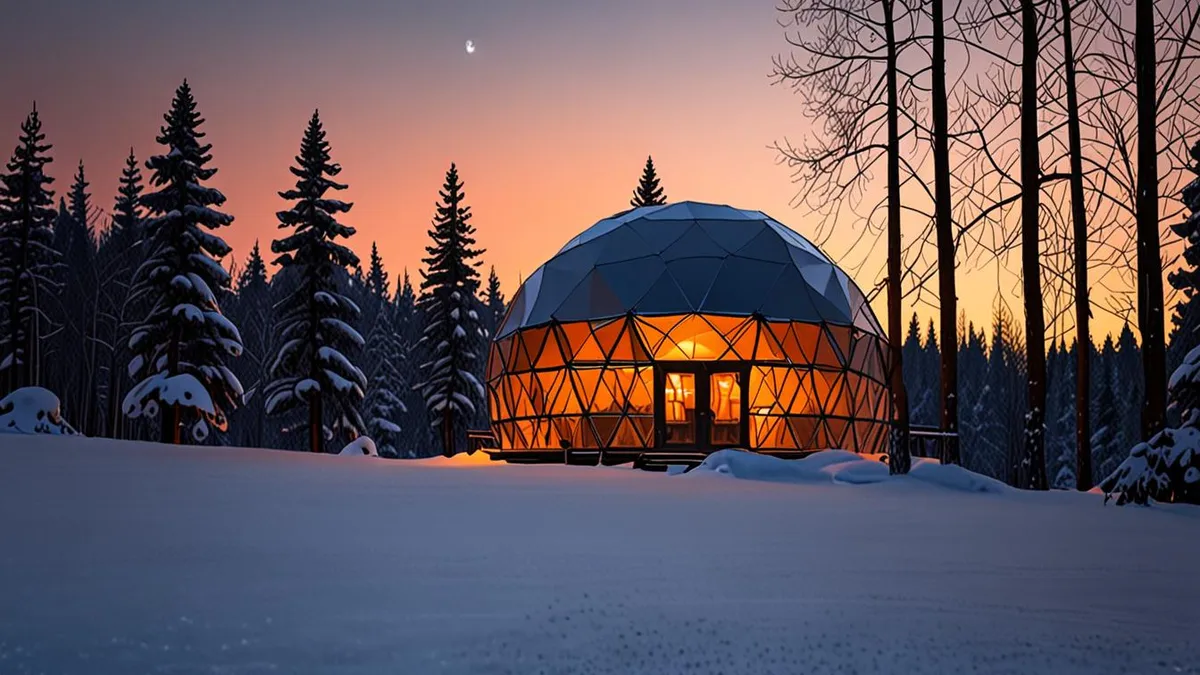
Safari tents are the most likely to feel like a hotel room under canvas. They usually sit on permanent platforms connected to the site’s power supply, so you get wall sockets, proper lighting and a choice of electric or wood heating. Yurts and bell tents sit at the other end of the spectrum, relying on wood stoves for warmth and solar lighting, often with limited or no sockets at all. Glamping domes in cold climates are usually winterized with insulated panels, a wood stove and reliable power, while treehouse and cabin-style stays almost always come with full electricity and built-in heating.
- Safari tents: many include small kitchenettes with a fridge and kettle, which only work because of a proper grid connection.
- Yurts: the round shape and lattice walls lose heat faster than insulated panels, so the stove is genuinely your lifeline, not a bonus.
- Bell tents: on seasonal sites these are often taken down in winter entirely, so cold-season availability is limited to begin with.
- Domes: the transparent panels make them feel warmer in daylight but mean you’ll want the stove lit well before sunset.
- Treehouses and cabins: solid walls and lockable doors mean heating behaves like a normal home, holding warmth overnight without refuelling.
How Heating Works in Cold-Season Glamping
Cold-season glamping is a genuinely different experience from a summer stay, and knowing how the heat actually works removes most of the anxiety. For a full picture of what winter stays involve, see how glamping in winter and cold-weather stays work.
Wood stoves: the standard for yurts and domes
In yurts and domes, a wood stove is the standard heating method, and it needs attention. These stoves typically need refuelling every 2-4 hours overnight, which means either waking up to add logs or accepting that the tent will have cooled by morning. Many hosts supply a basket of logs as standard, with extra available on site, but it’s smart to ask what’s included when you book.
Some sites make life easier by pre-warming tents before check-in or lighting fires for guests in the evening during the October to March season. It’s a small service that makes a big difference on arrival after a cold drive.
Electric heating and what it costs
Electric panel heaters and underfloor heating appear mainly in tents with mains power and insulated floors, most often safari tents and winterized domes. These hold a steady temperature without overnight attention, which is why many travelers prefer them for winter trips with kids. The trade-off is price: winterized stays typically cost roughly 20-50% more than basic summer tent rates, reflecting the insulation and heating infrastructure behind them. Check current rates with the site, as pricing varies by location and demand.
What to Do When There Is No Mains Power
Not every glamping tent is wired to the grid, and that is not necessarily a bad thing. Many off-grid sites solve the power problem in practical ways, so you can usually still charge a phone, run a headlamp and keep a small device topped up. The key is knowing what the setup actually covers before you pack.
Solar panels and battery packs are the most common solution at sites without a mains connection. They typically handle LED lighting and phone charging without any trouble, but they rarely have the capacity for high-draw appliances. A hairdryer, electric kettle or travel heater will usually drain a small battery system quickly or simply fail to run at all.
Because setups vary so much from one site to the next, it pays to ask specific questions rather than assume. Before booking, check:
- Whether there is a shared charging area in a common lodge, which is useful if your tent itself has no sockets and you need to charge a camera, tablet or e-reader overnight
- If the site lends portable power banks to guests, since some off-grid operators keep a small stock for exactly this purpose
- Whether USB charging points in the tent are powered around the clock or only while the solar batteries hold a charge, which matters on cloudy days
- How the site handles practicalities beyond power, too – for example, if you are traveling with a dog, how to find out whether a glamping site is pet-friendly uses the same direct-question approach you would apply to electricity
A quick message to the host covering these points takes five minutes and removes almost all of the guesswork from an off-grid stay. Ask about charging options at the same time you confirm heating and power availability, ideally 1-2 weeks before arrival, so you have time to pack a power bank or extra cables if the site runs lean on electricity.
How to Confirm Electricity and Heating Before You Book
Nothing ruins a winter glamping trip faster than arriving to a cold tent with a dead phone and no way to fix either problem. The good news is that this is one of the easiest travel risks to eliminate, as long as you do a little homework at three stages: before booking, while booking and shortly before you travel. The key is knowing where to look and which questions actually matter, because listing photos rarely tell you anything about insulation, firewood supply or whether the sockets are powered all night.
- Read the amenity section carefully. Look for explicit mentions of sockets, the type of heating (wood stove, electric panel heater or underfloor heating) and whether the tent is available in winter at all. Vague wording like “rustic” or “back to nature” often signals limited power, so treat missing details as a warning sign rather than an oversight.
- Message the host directly. Ask two clear questions: what type of heating the tent has, and whether it is winterized for stays between November and February. A host who answers confidently and specifically is a good sign; a vague reply is your cue to look elsewhere.
- Reconfirm 1-2 weeks before arrival. This is especially important for cold-season trips, since heating systems can break down or firewood deliveries can slip. A short message asking “is the stove and lighting all working for our dates?” gives the site time to fix any issue before you arrive.
- Check recent reviews. Scan the most recent reviews for mentions of warmth, lighting and power. Guests who froze in March or charged phones in the lodge will usually say so, and recent feedback reflects the current state of the tent far better than reviews from two summers ago.
Doing this takes maybe fifteen minutes in total across all three stages, and it is the single most effective way to make sure the cozy, warm stay in the photos is the one you actually get. It also protects your budget: if a site turns out to be more basic than expected, you are far better off knowing before you pay than negotiating a refund in the dark with a shivering family. Treat the confirmation messages as part of your booking paperwork and save them on your phone, so that if anything does go wrong on arrival you have something concrete to point to. A little documentation goes a long way when you are standing in a field at nine at night asking for an extra blanket.
Packing and Budgeting for Power and Heat
Once you know what power and heating your tent actually has, you can pack and budget accordingly. Tents with full mains electricity need almost no extra preparation, but bell tents and basic yurts reward travelers who think ahead. A little extra weight in your bag is a fair trade for a warm, well-lit night in the middle of nowhere.
For tents with limited electricity, a power bank is non-negotiable. Bring one with enough capacity to charge your phone two or three times, and pair it with warm layers you can add or remove easily as the stove dies down overnight. Merino base layers, a fleece and a warm hat make far more difference than one bulky jumper.
Budgeting matters just as much as packing. Winterized stays typically cost more than the same tent in summer, reflecting the insulation, heating infrastructure and extra work the site puts in during the cold months. Compare winter and summer rates for the same tent before you book, and plan for that premium rather than being surprised at checkout.
A few small items earn their place in your bag many times over:
- A thermos flask filled before the site’s kitchen closes, so you can make a hot drink at 2 a.m. without leaving the warmth of your sleeping bag
- Thick socks and slippers for wood-stove tents, where floors stay cold and temperatures drop noticeably in the hours before the fire is refuelled
- A small headlamp with fresh batteries, since solar-powered lighting in basic tents can be dim and is no help at all if you need to step outside to fetch firewood
- Heat packs or hand warmers, which are cheap, weightless and take the edge off the coldest pre-dawn hours in a yurt or bell tent
With the right kit and a realistic budget, even a tent with no sockets and a temperamental stove becomes a genuinely comfortable winter base rather than a test of endurance.
The Bottom Line on Power and Warmth in Glamping Tents
So, will you arrive to a freezing, powerless tent? Usually not. Most safari tents, glamping domes and cabin-style stays come with electricity and proper heating, whether that’s sockets and an electric heater or a wood stove that keeps things cozy all night. Basic bell tents and simple yurts are the ones that may offer only solar lighting and a wood stove, so they need a little more planning.
If you’re booking a cold-season trip between October and March, a winterized stay typically carries a premium over basic summer-season rates, but you’ll get insulation and reliable heat in return. The single best way to avoid a cold surprise is simple: confirm the heating type and power setup with your host before you pay, then reconfirm 1-2 weeks before arrival. Have you glamped in winter? Share your experience in the comments or pass this article along to a friend planning a chilly getaway.