Glamping promises comfort in the wild, but storms, curious animals and open fires can still turn a dreamy stay into a stressful one without basic preparation. A luxury tent is still a tent, and a cozy dome is still sitting in a field where weather, wildlife and flames behave on their own terms. The good news is that glamping safety comes down to a handful of simple habits, most of which you can handle before you even leave home.
This guide walks through the essentials: how to vet a site before you book, how to read forecasts and pack for changing conditions, how to store food so animals stay away from your sleeping area, how to manage campfires responsibly, what to put in a practical safety kit, and how to keep kids and pets safe on site. A final checklist pulls everything together so you can head out relaxed, knowing the basics are covered.
Why Glamping Safety Starts Before You Book
The most effective safety step you can take happens before any money changes hands. A well-built glamping site and a poorly built one can look identical in photos, so you need to ask questions directly. Contact the operator and ask how their structures handle high winds, heavy rain and snow load. A confident operator will answer easily; hesitation or vague replies tell you something too.
Read reviews like a detective
When you scan reviews, don’t just look at star ratings. Search specifically for mentions of weather problems: leaks, standing water, poor drainage, cold nights or heaters that couldn’t keep up. One review complaining about a soaked floor after a storm is an anecdote; three reviews mentioning the same drainage issue is a pattern.
Timing your booking
For June-August stays, book 2-6 months ahead. This gives you real choice among well-reviewed, well-built sites instead of picking through whatever is left in peak season. Late availability tends to be the structures nobody wanted, often for good reason.
If you’re traveling between November and March, confirm the site has heating genuinely rated for the season, not just a small portable heater. Ask what the nighttime temperature inside the unit typically sits at in midwinter, and whether heating is included or billed separately.
Weather Safety: Reading Forecasts and Packing for Conditions
Glamping puts you closer to the weather than a hotel ever would, so treat the forecast as part of your trip planning. Check it 48 hours before departure, then again on the morning you travel. Conditions can shift quickly, and that second check is what decides whether you pack the extra rain layer or the warmer sleeping clothes.
Choosing your dates wisely
If your schedule is flexible, favour shoulder-season months like May and September. These typically bring milder, more stable conditions than midsummer storms or deep winter, and sites are quieter too. If you do want a cold-weather stay, it helps to understand how winter glamping actually works, because heating and insulation matter far more than the view.
Packing for cold nights in any season
Even in summer, temperatures can drop 10-15°C overnight in many glamping locations, especially in hills, forests or near water. Pack in layers: a warm midlayer, a waterproof jacket, and sleepwear suited to cooler nights. A pair of warm socks for the tent floor goes a long way toward comfort.
Finally, ask the operator about their severe-weather plan before you arrive. Where should you shelter if a storm rolls in? How will staff alert guests, and is there a safe gathering point? Knowing this in advance means you won’t be figuring it out in the rain.
Wildlife Awareness: Food Storage and Campsite Habits
Wildlife problems at glamping sites almost always start with food. Animals have an excellent sense of smell and no interest in your boundaries, so the way you store snacks matters more than anything else you do on site. Keep all food, snacks and scented items in sealed containers or in the lockers many sites provide. That includes toothpaste, sunscreen and anything else with a noticeable smell.
The golden rule for wildlife areas is distance. Keep food storage at least 30 meters from sleeping tents wherever foxes, raccoons or bears are active, and never keep food inside sleeping structures, even in sealed bags. A sealed bag means nothing to a raccoon’s paws or a bear’s nose, and an animal that smells food inside your tent will test the fabric to get it.
Your best source of local knowledge is the site staff. Ask which animals are active in the area and what they recommend during an encounter. In most cases the advice is simple: make noise, back away slowly, and never run. A few other habits worth building:
- Cook and eat away from where you sleep, so food smells don’t settle around your tent overnight.
- Dispose of rubbish in site bins every evening rather than letting it accumulate outside your unit.
- Wipe down tables and cooking surfaces after meals so crumbs and residues don’t attract nighttime visitors.
- If you’re bringing a dog, check whether the site is genuinely pet-friendly and keep it leashed, since pets can provoke wildlife or lead animals back toward sleeping areas.
Fire Safety at the Glamping Site
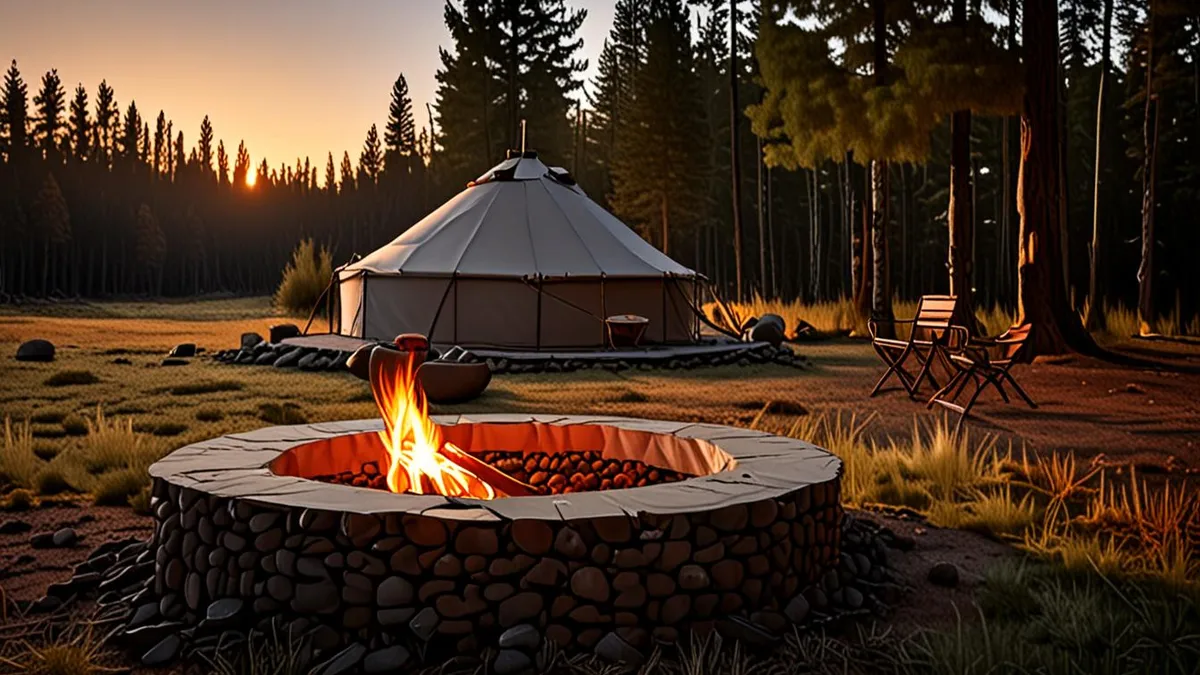
A campfire is often the highlight of a glamping trip, but it is also the single biggest risk at most sites. Even when your accommodation is a sturdy dome or cabin rather than a flimsy tent, canvas, wood decking and dry grass all burn fast. Add in a dark site, a drink in hand and no staff nearby, and it is easy to see why operators take fire rules so seriously. A few simple habits keep the evening fire enjoyable instead of dangerous.
- Keep every fire at least 3 meters from structures and branches. That distance applies to tents, domes, cabins and anything overhanging, like low tree limbs or fabric awnings. Heat radiates further than most people expect, and a gust can push sparks several meters sideways.
- Never walk away from a lit fire. Unattended fires are how most campsite accidents start. Before you go to sleep or leave the area, douse the fire completely with water, stir the ashes, and douse them again. If the ashes are too hot to touch, they are not out.
- Use only the fire pits the site provides. Designated pits are positioned away from structures and often have a ring or raised base. Follow the site’s rules on wood, too. Some sites supply seasoned wood on purpose, because damp or treated wood smokes heavily and throws more sparks.
- Check for fire bans before you light anything. During dry summer stretches, many regions impose temporary bans on open fires, and lighting one during a ban can carry serious penalties. Ask the site operator or check the local authority’s website on the day, since conditions change quickly.
Treat the fire pit like the stove in your kitchen: useful, pleasant, and never something to be careless with. If the wind picks up or the fire starts throwing sparks beyond the pit, let it burn down early rather than pushing your luck. The fire will still be there tomorrow night, and so will you. And if you are ever unsure whether conditions are safe enough to light one at all, skip it and ask the staff instead—most operators would far rather answer a question than deal with a scorched deck.
Packing the Right Safety Kit
Glamping sites look polished in photos, but many sit in remote spots with limited lighting, patchy phone signal and no shop on hand. The fix is a small, thoughtfully packed kit that covers light, communication, minor injuries and the local insect population. It takes up little space in the car and saves a lot of frustration.
Start with lighting, because it is the most commonly forgotten item. Many sites keep exterior lighting low on purpose, both for atmosphere and to protect wildlife, so paths, steps and the walk to the bathroom can be genuinely dark. A headlamp beats a phone flashlight because it leaves your hands free for unlocking doors or finding things in a bag.
Signal is the second common surprise. Rural sites often sit in valleys or wooded areas where coverage is weak or nonexistent, which makes offline maps and a charged power bank more than nice-to-haves. Download the map of the area before you leave home, and top up your battery whenever you get the chance.
- Headlamp or lantern with spare batteries. Pack one per adult, plus a soft lantern for inside the unit so you are not navigating a dark cabin at 2 a.m.
- Basic first-aid kit. Include blister plasters, antiseptic wipes, bandages, tweezers and any personal medication, since the nearest pharmacy may be a long drive away.
- Power bank and charging cables. Choose one with enough capacity for at least a couple of full phone charges if the unit has no outlets or power cuts in a storm.
- Offline maps saved on your phone. Download the surrounding region in advance, because you may need directions precisely where the signal drops out.
- Insect repellent and a tick-check routine. For spring and summer trips, repellent earns its space, and a quick tick check after walking through grass or woodland is a smart evening habit.
- Printed site address and emergency contacts. If your phone dies or has no signal, a paper copy of the site’s address plus local emergency numbers is the reliable fallback.
For a fuller, item-by-item rundown of what belongs in your bag, this complete packing checklist for your glamping trip covers clothing, bedding and kitchen extras alongside these safety basics. Build the kit once, keep it in a dedicated bag, and it will be ready every time you book a stay.
Staying Safe With Kids and Pets on a Glamping Trip
Glamping is one of the easiest ways to introduce children to the outdoors: real beds, a proper door and none of the wrestling with tent poles. But a site is still an outdoor environment, with fire pits, stoves, ponds and wildlife, so a little preparation keeps the trip fun for everyone, including the grown-ups.
Setting boundaries on arrival
Do your safety briefing within the first few minutes, while everyone is still together and excited rather than scattered. Walk the children around the unit and point out the hard rules: fire pits and stoves are adult zones, water features are off-limits without a grown-up, and nothing gets touched near the cooking area. Kids respond well to clear, simple lines, especially when you explain why rather than just banning things.
If you are traveling with toddlers, ask the operator directly whether the site is fenced, gated or supervised before you book. Some sites are open-plan by design, which is lovely for views and less lovely for a two-year-old with a talent for wandering. Knowing this in advance lets you choose a unit positioned away from water and fire areas, or bring a playpen for the deck.
Pets and getting separated
Policies for animals vary a lot from site to site, so check before booking rather than assuming your dog is welcome. Once you arrive, keep pets leashed in areas where wildlife is active, both to protect local animals and to avoid an excited dog bolting into the woods at dusk. Ask staff where owners typically walk their animals and whether there is a designated off-leash space.
On larger sites, agree a simple meeting point the moment you arrive: the reception building, the parking area or a recognizable landmark. Phones often have weak signal in rural locations, so a fixed spot everyone knows beats trying to call each other. For younger children, make sure they know to find a staff member if they get lost, and point out what staff uniforms or the reception look like. Ten minutes of planning on day one buys you a genuinely relaxed stay.
The Glamping Safety Checklist at a Glance
A comfortable bed under a canvas roof sounds like the perfect escape, and for the most part it is. Still, a glamping trip puts you closer to the elements than a hotel ever would, and a little preparation goes a long way toward keeping things relaxing. The good news is that staying safe takes very little effort once you know what to look for.
Think of this as your quick-reference overview: the sections below walk through each stage of a trip, from choosing a well-built site and reading the weather to handling wildlife, managing fires and packing a sensible kit. Each one covers practical steps you can take in minutes, not hours, so you can spend your energy on the fun parts of the trip instead.
Once the basics are covered, glamping stays as comfortable as it looks in the photos. If you have a tip or a story from your own trip, share it in the comments below.